Arduino UNO R3 for Beginners: Why It’s the Best Board & How to Connect an LED
- saranprakashkiwist
- Aug 7, 2025
- 3 min read

Updated: Sep 24, 2025
If you're just getting started with electronics, coding, or DIY projects, the Arduino UNO R3 with USB Cable is your perfect companion. This development board has introduced millions of learners around the world to the exciting world of microcontrollers and embedded systems.
Whether you're a student, a teacher, or a curious hobbyist, this board provides a simple yet powerful platform to build and test interactive electronic circuits.
What is the Arduino UNO R3?
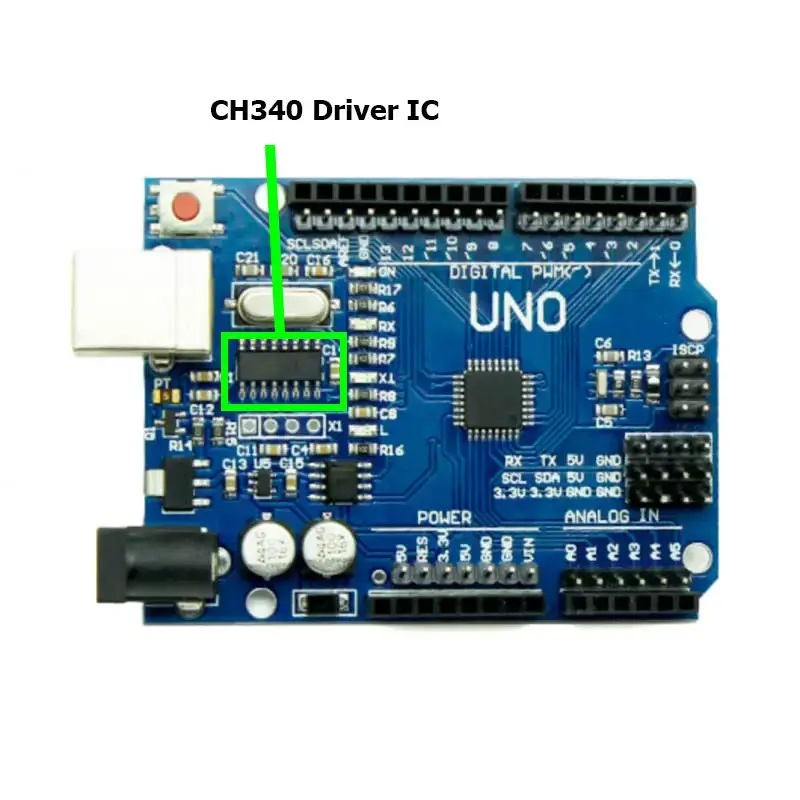
The Arduino UNO R3 is a microcontroller board based on the ATmega328P chip. It's part of the popular Arduino family, designed to make coding and electronics more accessible to everyone. Paired with a USB Type-B cable, you can easily connect the board to your computer for both power and programming.
What’s Included?
Arduino Uno R3
USB A to B Cable for Arduino UNO
Tip: You don’t need any external power supply — the USB cable powers the board and allows you to upload code directly.
Technical Specifications
Feature | Details |
Microcontroller | ATmega328P |
Operating Voltage | 5V |
Input Voltage | 7–12V (via barrel jack) |
Digital I/O Pins | 14 (6 with PWM support) |
Analog Input Pins | 6 |
Flash Memory | 32 KB |
SRAM | 2 KB |
EEPROM | 1 KB |
Clock Speed | 16 MHz |
USB Interface | Type-B |
Key Features
Compatible with Arduino IDE (Windows, Mac, Linux).
Plug-and-play via USB.
Breadboard-friendly pin layout.
Strong support from the global Arduino community.
Simple Experiment: Check if Your Arduino UNO R3 Board Works
Let’s test the board with a Blink LED experiment. This verifies that the board, USB connection, and IDE are all working.
What You Need:
Arduino UNO R3
USB Cable
Arduino IDE (Download from arduino.cc)
Steps to Run the Blink Sketch
Connect the Board

Open the Arduino IDE
Go to Tools > Board and select Arduino Uno.

Go to Tools > Port and select the correct COM port.

Open the Blink Example
Go to File > Examples > 01.Basics > Blink

Upload the Code
```cpp
void setup() {
pinMode(LED_BUILTIN, OUTPUT);
}
void loop() {
digitalWrite(LED_BUILTIN, HIGH);
delay(1000);
digitalWrite(LED_BUILTIN, LOW);
delay(1000);
}
```
Observe the Board
The onboard LED should start blinking every second.
If it blinks: Your board is working perfectly.

Blink External LED with Arduino UNO
Now let's try blinking an external LED using pin 2.

What You Need:
Arduino UNO R3
USB Cable
Arduino IDE
LED (any color)
Resistor (220 ohms)
Breadboard
Jumpers
Circuit:
Connect the LED’s positive leg (longer) to pin 2 through a 220Ω resistor.
Connect the negative leg (shorter) to GND on the board.

Upload the below code by copying and pasting it into the Arduino IDE.
```cpp
void setup() {
pinMode(2, OUTPUT);
}
void loop() {
digitalWrite(2, HIGH);
delay(1000);
digitalWrite(2, LOW);
delay(1000);
}
```
What You Should See:
Now observe the output; the LED connected to pin 2 should start blinking every second.
Final Thoughts
The Arduino UNO R3 is a versatile and easy-to-use microcontroller platform perfect for electronics beginners. With just a USB cable and a few components, you can start building interactive projects in minutes.
The Arduino UNO R3 opens up a world of possibilities for creativity and learning. Whether you're creating simple projects or diving into complex systems, this board is an excellent starting point for your journey into electronics and coding.

Comments