How to Install CH341/CH340 Driver for Arduino UNO SMD – Step-by-Step Guide
- kiwistronics
- Jul 25
- 2 min read

If you're using an Arduino UNO SMD board and your PC is not detecting the board or the COM port is not showing in Arduino IDE, the issue is usually with the missing CH341 or CH340 USB driver.
In this guide, we’ll walk you through the complete driver installation process to fix the issue and get your Arduino board up and running.
What is CH341/CH340?
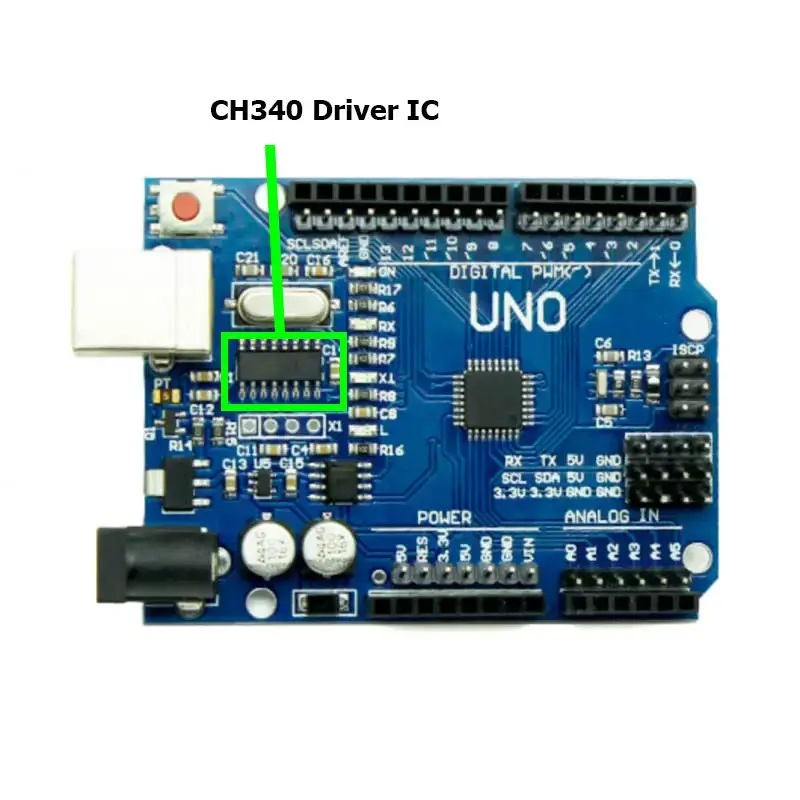
The CH341/CH340 is a USB-to-serial converter chip used in many low-cost Arduino boards, especially the Arduino UNO SMD (Surface Mount Device) version. Without this driver, your computer won’t recognize the Arduino board.
Requirements
Arduino UNO SMD board
Windows laptop or desktop
Arduino IDE installed
Internet connection
Step-by-Step Driver Installation
Step 1: Download the CH341/CH340 Driver
Go to our official website: https://www.kiwistronics.com/resourses
or Direct download
Find and click on the “CH340/CH341 Driver – Windows” download link.
A ZIP file will be downloaded to your Downloads folder.
Step 2: Extract the ZIP File
Go to your Downloads folder.
Right-click the downloaded ZIP file.
Choose “Extract All…” and extract it to a folder.
Step 3: Run the Setup File
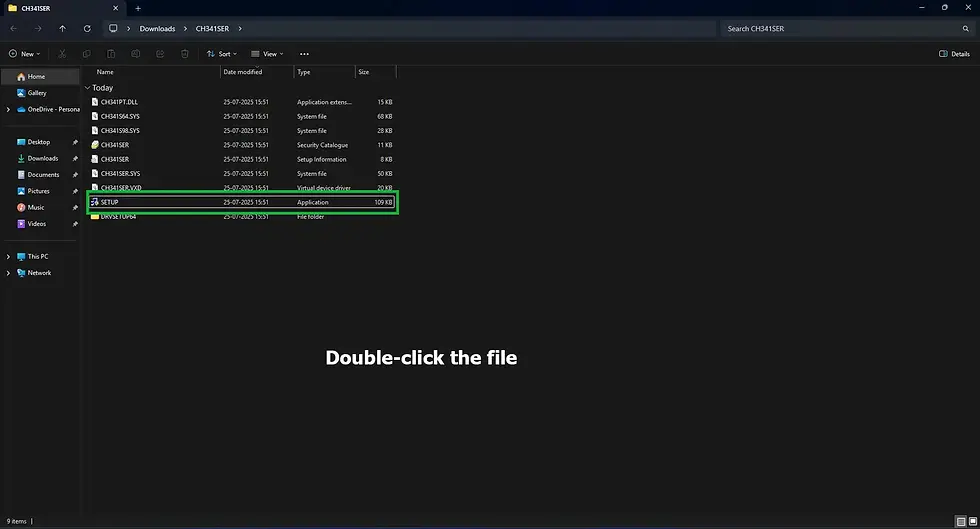
Open the extracted folder.
Look for the file named SETUP.EXE or CH341SER.EXE.
Double-click the file to run the installer.
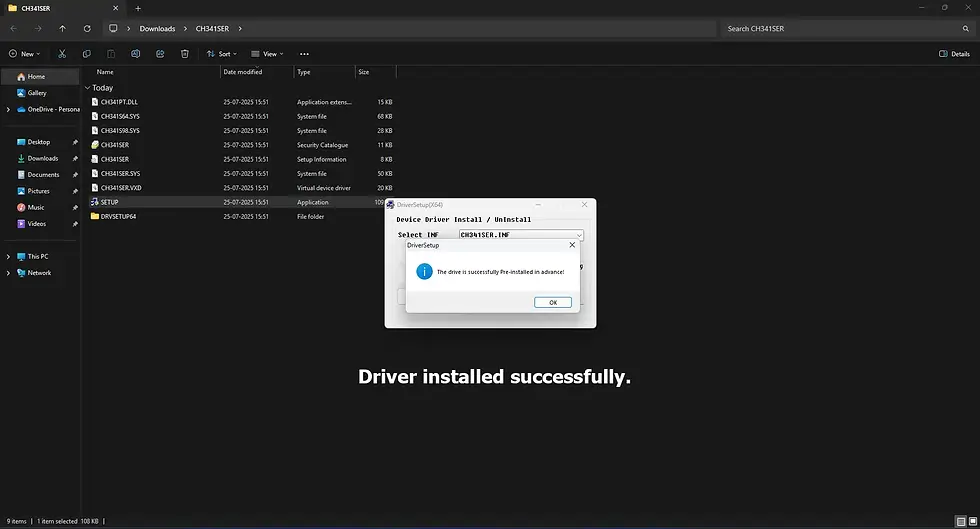
A setup window will appear – click the “Install” button.

CH340 DRIVER INSTALLATION (click the install button) Wait a few seconds; a popup will show “Driver installed successfully.”
Step 4: Connect Your Arduino UNO SMD
Plug your Arduino UNO SMD board into the USB port.
Wait for Windows to detect the board.
If installed correctly, Windows will assign a COM port to it.
Step 5: Check in Arduino IDE
Open the Arduino IDE.
Go to the menu: Tools → Port.

Select Your COM Port You will now see a COM port (e.g., COM3, COM4).
Click on it to select the correct port for uploading code.
That’s it! Your Arduino UNO SMD is now ready to use!
Troubleshooting Tips
If no COM port is showing, try unplugging and plugging the USB again.
Use a good quality USB cable (some power-only cables won’t work).
Try restarting your computer after driver installation.
Download Link
CH341/CH340 Windows Driver: https://www.kiwistronics.com/resourses
or Direct Download
Installing the CH341/CH340 driver is a one-time setup that ensures your Arduino UNO SMD board communicates smoothly with your PC. This simple process solves "port not showing", "board not detected", and upload error issues.
If you found this guide helpful, don’t forget to share with your friends and check out other beginner tutorials on our site!
Comment below or reach out to us at info@kiwistronics.com or Chat us 8124422676 — we’re happy to help!
Thanks for reading! Feel free to comment, .
– Team Kiwistronics ❤️www.kiwistronics.com

Comments